Wear Particle Analysis Using Ferrography
A cost-effective technique for detecting abnormal wear of lubricated components.
Ferrography is a wear particle analysis utilizing diagnostic and predictive techniques to evaluate the on-line condition of interacting lubricated or fluid powered parts or components. The use of Ferrography to evaluate a system’s condition is to avoid time-consuming and potentially damaging hardware teardown and other destructive or interfering inspections.
Ferrography can analyze a system’s fluid to determine the type of wear it is experiencing; and, hence, predict the type of system failure and when the failure may occur. Ferrography can provide an established and easily performed inspection method for determining the health of a system and providing an early failure detection method.
The present article, published by NASA referred that the application experience was on KSC Payload Facility Crane Gear Reducers.
Ferrography is a very useful and comprehensive analysis for trending and reporting. At a minimum, the user can obtain an analytical means of monitoring the wear condition; and, at the same time, accrue the necessary sample points required to establish a wear particle concentration baseline and retain the presence of non-magnetic particles for visual inspection and evaluation.
The advantage of Ferrography over other preventive maintenance systems is its capacity to detect a broader range of types and sizes (0.1-500 microns) of wear particles. A micron is 10-6 meters. The ferrographic analysis encompasses wear (metallic and non-metallic), contaminant (crystals, water, and organic and inorganic compounds), and lubricant (friction polymers) monitoring.
Typical wear problems identified by Ferrography; gear teeth wear through excessive load or speed, misalignments, fractures, rolling contact failure, water in the oil or poor lubricant condition, oil additive depletion, outside contaminants such as sand or dust, camshaft and cylinder wall failure, oil filter failure. There are many others.
Industrial application of Ferrography entails the non-interruptive machine condition monitoring of heavily used lubricated mechanical systems. Hence, an operational baseline can easily be established by sampling every 50-500 hours of operation (approximately every one to three months, depending on system criticality), and used for quantitative trending analysis. Any anomalies in the wear particle concentration, especially in the generation rate of large particles (>20 microns), is symptomatic of the onset of failure. For consistent results and accurate trending, lubricant samples are taken from the same places in the system each time.
The method of sample extraction assures that the lubricant samples contain a representative selection of wear particles. The samples are then ferrographically analyzed both quantitatively and qualitatively. The Direct Reading Ferrograph (DRIII) classifies metallic wear particles as either large (>20 microns) or small (<20 microns) and calculates the large to small wear concentration. These values are entered into the personal computer-based Ferrotrend database, which compiles the data points for wear trending analysis. This process determines the existence of a malfunctioning component in the system.
The Dual Ferrograph Analyser prepares the ferrogram (slide) for analysis through the Ferroscope IV Microscope. The qualitative analysis is documented in the Ferrogram Analysis Report Sheet which documents the severity concentration of specific normal and abnormal wear particles.
The ferromagnetic particles are sorted by gravity according to relative size, with larger particles appearing at the leading entry of the ferrogram. Non-magnetic particles (including contaminants and friction polymers) are distributed throughout the ferrogram. This process indicates the presence of contaminants, the condition of the lubricant, and the material composition of the abnormal wear particles being generated, from which the source of the wear may be deduced. Ferrography is just one of the methods used at KSC. Ferrographic, viscosity, total acid number and vibration analysis are cooperative elements of the predictive maintenance program.
The Benefits
- Ferrography provides early detection of abnormal wear of the lubricated critical internal components of mechanical systems;
- Analyses the debris in system lubricants;
- Shows particle size, shape and colour as well as quantity;
- Reveals which system component is wearing, and to what degree, and pinpoints the cause of the wear.
| Actual Photos | Description | Examples of Causes |
|---|---|---|
|
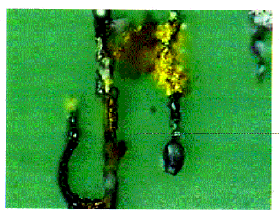
Cutting Wear |
Long, curled strips of metal | Normal Machine Wear |
|
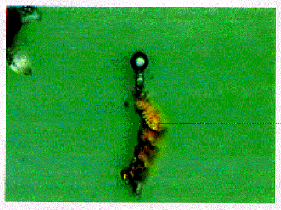
Spherical Wear |
Small Spheres |
Contamination or rolling contact fatigue failure (Bearings, cams, and gears.) |
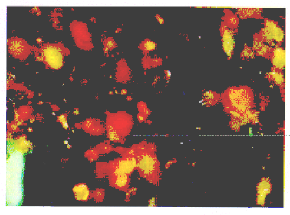
Red Oxide Particles |
Red particles aligned in magnetic | Water in the oil or poor
lubricant condition |
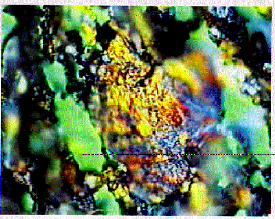
Bearing Wear |
Flat (1-micron thickness) particle
with perforations |
Rolling Contact Fatigue |
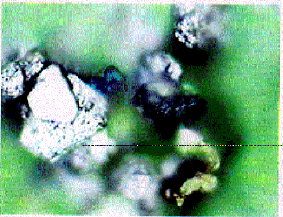
Molybdenum Disulfide |
Nonferrous particle, grey in
colour with many shear planes. |
Solid lubricant additive in system |
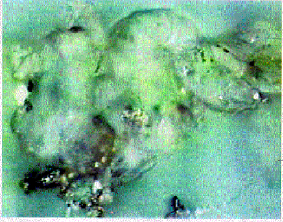
Friction Polymers |
Amorphous materials which
pass transmitted light |
Excessive load or stress |


